Tuesday, January 31, 2012

Homemade pasta noodles

I have tossed around the idea of making fresh pasta noodles before, enough so that my mom brought me my grandmother's old pasta maker/cutter/thingy/whatever you call it so that I could give it a shot. It sat in the closet for a while, I will admit, because it sounded like such a daunting task.  The stars were aligned a couple weeks ago though, when Michelle mentioned on one of the pinterest pins that she's always wanted to make pasta too...and then it just so happened we had a Saturday free up very soon after...it was like it was meant to be!  So the 5 of us brave girls (Christina, Michelle, Amanda, Aubrey, and I) set forth that weekend to make homemade noodles, a homemade bolognese sauce, and homemade garlic parmesan knots. 

The noodles were surprisingly easier than I would've imagined. Very quick and simple, just requires a few hands so I think it would be hard to accomplish on your own. I am now ruined though. I love homemade noodles, so chewy and fresh.  The store bought ones seem beneath me now....ugh.

1.5 cups all purpose flour
1 cup course semolina (or 3 cups all purpose flour if you can't find semolina)
4 large eggs

Michelle said the semolina was hard to find and pretty expensive, but it makes the pasta springier and perfect so I would use it if  you have the opportunity.  If not, extra flour works too.

Mix together the flour and semolina in the bowl of a stand mixer , or mix them up and create a mound on the counter top with a crater in the center...if using a stand mixer, add the eggs to the dough and mix them together with the paddle or dough hook until well mixed.  On the counter top, crack the eggs in the center of the flour and semolina and use your fingers to gradually draw the dry ingredients into the center, mixing them with the eggs.  The dough will be hard to mix at first, a pastry scraper will help you to draw it all together, but eventually it will come together and be relatively smooth.


Knead the dough with the heel of your hand for at least 3 minutes until the dough is very smooth. The dough shold not feel sticky. If it sticks to your fingers, knead in a small amount of flour, just enough so your fingers come away clean when you pull them away.  Wrap the dough and let it sit at room temperature for an hour (you can keep the dough at room temperature for several hours).


To roll out the pasta, on a lightly floured surface, cut the dough into a few pieces. Working with one piece at a time, roll the dough out into a rough rectangle, and then pass it through your pasta machine on the flat setting to get the dough an even width.  Then enter the flattened dough into your desired noodle cutter..we did fettucine this time so will try the spagetti side the next time.


Once rolled, fresh pasta should be dusted with semolina (preferably) or flour to keep it from sticking if you're not going to cook it right away. We laid the noodles up on the pasta drying rack to keep them from balling up together since we were boiling them immediately when done processing the noodles.


This pasta machine was my late grandmother's so I found some neat things in the box when we opened it up.  A handwritten pasta recipe from her was the best surprise I ever could have gotten!  This will be a great addition to my family recipe cookbook...how neat was it to find a surprise like this years after she left the Earth?!  It sort of made me feel closer to her, I'm very happy that I finally dug into the box...


There were also old magazine pages she ripped out with ideas on how to experiment with different flavored noodles like red bell pepper pasta, poblano chili pasta, dry anaheim chili pasta, or jalapeno chili pasta. Basically you roast fresh peppers or chilies in a hot oven until skins blacken, then cool in a paper bag, peel, seed, and puree.  Combine the puree of pepper or chilis with the egg and flour to make dough, and then mix as described earlier. Roll the pasta dough out as we already discussed and you've made flavored pasta!! Can't wait to try this next....but here is the result of our first try...operation fresh fettucine was a success! Next time I want to try spagetti noodles and add some peppers in there...I'll let you know how it goes :)


Pin It


Monday, January 30, 2012

Michelle's crab rangoon

Michelle is officially the crab rangoon queen when we have sushi parties.  I apologize for putting these on a skinny kid food blog but there's really no way you can omit a good crab rangoon from your repertoire, can you?  I don't believe there's ever been even one stray rangoon left over...and that's saying something.  File this away for your next fryer party...and thank Michelle in your head as you're licking your lips!

1/4 c sour cream
2 (8oz) cream cheese- room temp
1 cup crab meat- usually use whole pkg
2 grn onions, thin slice
1-2 cloves garlic, minced
2 tsp soy sauce
1 tsp sugar
Wonton wrappers

Whip together sour cream, cream cheese, soy sauce and sugar until smooth.

Fold in remaining ingredients.

Moisten edges of wonton with water, 1 to 1 1/2 tsp of mixture in middle and fold over.

Fry!


Pin It


Friday, January 27, 2012

Parmesan crusted tilapia

Just so you know...don't buy this.  This is not a recipe post, this is a warning post. I was so pumped to try this parmesan crusted tilapia, and was so excited that all I had to do was throw it in the oven and make a salad.  Easy peasy, right? 

Well, sometimes easy isn't the answer. I ate it.  But it tasted like a fish stick so I had to dip it in cocktail sauce.  Seriously like a cheapo fish stick like your parents used to feed you. Grody. The salad made up for it though...it's one of my faves.  You can find the recipe for the strawberry poppyseed salad here, just so you feel like you walked away with something from this post....but heed my warning for the tilapia, and don't be fooled by the good-looking, nicely browned piece of fish in the bottom photo, my friends! Unless that is you like fish sticks...


Pin It


Thursday, January 26, 2012

Parmesan fettucine with sauteed chicken and grape tomatoes

I'm telling you....last week was good eating around our joint!  Too bad Justin wasn't a fan of some of the things I'll post from this week, but I guess you can't win 'em all...

This was sort of a copycat of a meal I had at Pazzesco in Ames when we were shopping for a place for the rehearsal dinner for our wedding in October. We were all very impressed with our food, being it was the first time any of us had been there.  My mom had a grilled romaine salad...they literally threw the head of romaine on the grill...sounded weird but she loved it! Justin's mom and I both had this pasta that was to die for...I had a small amount of leftovers that didn't even make it till morning when Justin saw the white box in my hand that night.  That meal used angel hair pasta and was just delish, but I happened to have some fancy schmancy parmesan parsley fettucine noodles that Mama K had gotten me for Christmas so I used those instead....

2 skinless chicken breasts, seasoned with garlic powder, lawry's, etc and baked, then cut into bite sized pieces
1/2 t dried oregano
1/2 t dried basil
pasta of your choice
2 cups grape tomatoes, halved
6 cloves garlic
3 T chopped fresh basil
3/4-1 cup olive oil

Just add all the spices and oil into the skillet to warm, and then add the tomatoes and chicken to soak up the flava flav.  Cook the noodles according to the package instructions and then add them to the skillet as well...Bada bing....


Bada Boom!!


Now, although olive oil is pretty high in fat, it's good fat and very heart healthy so don't feel guilty having this as a Sunday meal and having some extra calories...your body will thank you :)

Pin It


Wednesday, January 25, 2012

Baked chicken parmesan

I thought this was going to be a lot harder than it was...I made everything ahead (on Sunday and I believe I cooked this on Tuesday) and threw it in the fridge to cook later in the week (except the croutons, I added those right before throwing in the oven so they didn't get soggy).  I also thought I would need noodles since chicken parmesan is usually served on spagetti or something of the sort, but this was a meal in and of itself...which is great, because I dont always need carbs in the evening after working out!  Here's what you need:

2 T olive oil
2 cloves garlic, crushed
red pepper flakes to taste
4 large boneless, skinless chicken breasts
2 cups marinara sauce
1/4 cup chopped basil
8 oz mozzarella, shredded (I used 2%)
4 oz parmesan, grated
1 package garlic croutons (I used fat free)

Now you layer!  Olive oil, garlic, and pepper flakes on the bottom of a 9x13 baking dish.  Chicken boob (no, I will never grow up) laid out on top of that and spread with the marinara sauce.  Top with basil and half the mozz and parm....then throw the croutons on....then top with remaining cheese. 

I love when there's a paragraph that small with directions.  Makes my life hella easy! Throw that bad boy in the 400 degree oven for 40-50 minutes, and serve!


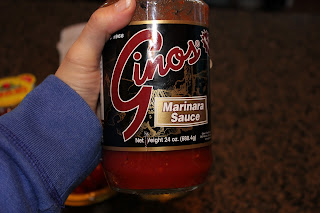
I've gotten a little addicted to the Gino's marinara sauce and their spagetti sauce as well...locally made, their restaurants always have top notch food, and their sauces are no different.  Good work, Gino!


I didn't think this step of spreading spices on the bottom would elicit so much flavor, but wow the chicken had awesome taste!


Done and done.  Nice and crunchy on top like it's breaded (but it's not), cheesy and saucy to perfection...this will be made again for sure! Im ate this for lunch for 3 days last week too and never once got sick of it...give it a shot!

Pin It


Tuesday, January 24, 2012

Pepperoncini beef sandwiches

I really thought that my only beef roast recipe that I would ever use would be Mama K's french dips....but this jumped right off the page for me when I saw it, had even less ingredients, and I happened to have a roast in the freezer screaming for some pepperoncinis!  As I stated yesterday, I'm in the habit of making dinners for the week on Sunday, so I have little to no work to do when I get home...it's dreamy! This was one of last week's concoctions that I just added the ingredients to the crockpot, threw it in the fridge, and told Justin which day to start it...

1-3 # beef roast
5 cloves minced garlic
16 oz jar of pepperoncinis (I used banana peppers)
crusty sandwich rolls
sliced swiss or provolone cheese

Throw it all in the crockpot (including the juice from your peppers), and cook on low for 8-10 hours.  Serve with a slice of cheese on a crusty bun and devour....not that you would be able to help yourself from doing that last part.


The leftovers were promptly killed the following night....these were magnificent! Just the right amount of heat, and no stomach problems later for my main man and his old man tummy.  This could very well take over the french dip recipe for me in the favorites department....man, last week was a great week for new recipes, I tell you!

Pin It


Monday, January 23, 2012

Sausage and spinach stuffed portabellos

I posted about this dinner on Facebook right after I ate it...it was that good. Here was my status: What was my life like before sausage stuffed portebellos on the Griddler?? I don't know how I lived...


Justin was a little nervous about the portebellos for some reason...he likes all mushrooms so I don't know what his deal was but he sort of cringed when I told him what was for dinner.  Seriously? There's sausage in it, that's like his #1 criteria for food love...so I didn't get why he was being weird about it. Never fear though, he enjoyed these so much, he ate all the leftover ones for lunches before I could get to them....and I didn't even have to ask if he liked them...after half a mushroom he said, "These are make agains".  One point for Abby!

I started my Kosama classes in the evenings a couple weeks ago and since then I have been making my meals for the week on Sundays so I just have to throw them in the oven, or start the crockpot, or whatever in the evening to save time and energy when I get home famished.  I made the stuffing on Sunday and put it in a container in the fridge so it was all ready to throw these babies on the grill when I got home....and they turned out perfectly that way.

6 large portabello mushrooms
1 lb italian sausage
1/2 T olive oil
1 onion, minced
1/2 cup tomato sauce
red pepper flakes to taste
1 T basil
1 bag baby spinach
2 T minced garlic
grated mozzerella cheese to top

Brown the sausage with the onion, garlic, olive oil, basil, and red pepper flakes.  Add the tomato sauce and the spinach to warm after the meat is done. From here I put it in the fridge but you could keep going if you're not making ahead...


This recipe caught my eye because I've been wanting to use my Griddler, but once I saw the ingredients, I knew it would be a keeper.  Yes, I'm still completely in love with this appliance! 

Take the stems out of the mushrooms and put on the greased Griddler (you can use a real grill too) for a few minutes with the bottom side down.


Flip the mushrooms over and let them cook for a while (10 minutes or so? I wan't counting the best) to get the tops done well...


I heated the container of mixture up in the microwave after I flipped the mushrooms back over to allow the bottoms to cook more, loaded the mixture into the mushrooms, and topped them with the cheese.


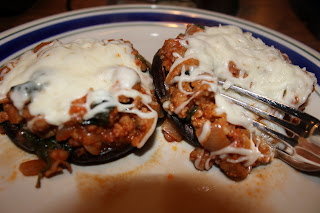
Let them grill for another 10 minutes or so on that side....and VOILA!  The mushrooms were tender but still meaty, the filling was soooo flavorful and fresh, and the cheese on top just shot it to another level!  I could've been full with one, but at 300 calories a piece, I went for a second one and skipped my Skinny Cow ice cream sandwich that night....and it was worth it.


If you didn't notice the tab below, these have been inducted into the Favorites section of the blog...so you're gonna wanna try them, mmmmmk?!

Pin It


Sunday, January 22, 2012

The Knot

Just in case you didn't see this on Facebook, here is our wedding website with guest information for hotels and all the wedding details for now before the actual invites go out...

The Knot

Friday, January 20, 2012

Homemade caramels

I don't care if you're a sweets person or not...you have to make these things. I can't wait to try it myself! My friend Leslie made these for Curty Curt's birthday party last weekend and I was in heaven.  I seriously thought she was lying to me that she made them herself.  I was nibbling on them all night (sparingly in my mind, since I'm trying to cut calories, you know) but decided that there was going to be a need for these in my life after that evening so I proceeded to steal a couple handfulls to keep for myself at home!  Yeah, I stole food....not proud of it but that's the life of a fat kid at heart, I suppose.

3 cups brown sugar
1 can sweetened condensed milk
1 cup light karo syrup
2 sticks oleo

Bring all ingredients to a full rolling boil and boil for 5 minutes (244-248 degrees on a candy thermometer) stirring often. Remove from heat and add 1 teaspoon vanilla. Pour into a buttered pan to set and cool, then cut and wrap in waxed paper.

I rationed these babies out and had 2 per evening after my dinner for a treat...and now they're gone :(  Which means someone needs to throw a party so I have an excuse to make these myself!!


Pin It


Thursday, January 19, 2012

Baby Greyson

I woke up this morning, read my emails, and checked facebook in bed, per usual. I then called Justin to see where he was because these days he's been getting up at 3-4 am to go check his snow properties in West Des Moines and see if they need salt or anything before the morning commute.  He was out in the shop working on his part of the wedding list and giving me a final list of his groomsmen and ushers....what a good boy! :)  I started the shower, as well as the fireplace, like I do every morning, so it would be warm when I got out and I just at the perfect time walked by my phone to see that it was ringing.  Somehow it got turned on silent...

I saw it said Cynthia Hofer and answered without thinking....but then I heard her voice.  She was exhausted and sounded like she had been up all night.  First thing out of my mouth was "Did something happen with George?" We have been calling the baby boy in her belly by the name of George since they didn't want to share his name with everyone until he was born...it stuck a little too well considering we would have to explain to people his name really wasn't going to be George! She said "Yeah, he's here..." and  I seriously thought she was kidding.  I know I let out an F-bomb...Im totally appropriate when it comes to babies, you know....but I immediately got goosebumps on my arms and tears in my eyes.  Cynthia wasn't due until February 12, but has been very uncomfortable the last couple of weeks, so they were thinking he was going to come early....and he sure did! 

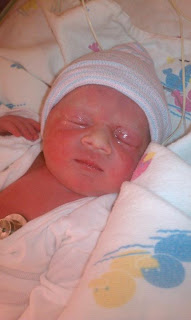
She said her water broke around 2 am so they headed to the hospital immediately, got there at 4 am and he was welcomed into the world at 4:14 am!!  "Speedy delivery" as the mailman from Mr. Rogers Neighborhood would say (sidenote: anyone remember that show?).  Greyson John Hofer was born at 4:14 am weighing in at 6 lbs, 7 oz and couldn't have a more perfect little face, if you ask me! What do you all think?? :)  I can't wait to meet you, Mr. Greyson....and congrats to your wonderful parents! What a beautiful family you will make....love you all! <3


Pin It


Wednesday, January 18, 2012

Chicken tortilla soup and beer bread muffins

This is not really a recipe, but more of an easy dinner solution if you need one. One of my girlfriends kids was selling Tastefully Simple products for her dance class, so I ordered a couple of things in order to help out.  I have had their beer bread before with their dips, but thought it might go well with their chicken tortilla soup.  Since Winter has officially sprung upon us, it's soup season fo sho! 

I got the value pack of beer bread, which contains 3 packages to make a loaf of bread. I, of course, do not bake...so I didn't have a bread pan, hence the beer bread muffins.  They took a little less time to cook but tasted just as good, and they're awesome served warm with a little butta on them...but just as good dipped in soup :)  All you have to do is mix a packet with a can of beer, and pour into your pan to bake (350 degrees for 15 minutes).  Nothing more to add...

Sidenote: Sam loves these little muffins for some reason...who knew dogs liked beer bread??

The soup was just as easy, I just added water and brought it to a boil while I baked 2 chicken breasts in the oven to shred and add to the soup.  I also added a can of black beans to bulk it up since we had the Hofers over for dinner that night (which Cynthia proceeded to pick out anyway, haha)...the box was a perfect portion for 4 adults.  So if you've never tried Tastefully Simple products before (and no, I am not a rep for them, nor do I sell their products), I would highly recommend both of these for a home cooked tasting meal done in less than 30 minutes (all but 5 minutes of that time being hands off). 

(Wow, that was a lot of parentheses!)

If you're interested in their dips, which are flipping amazing by the way, I have the Garlic Garlic and the Onion Onion.  Both are super good for parties and tend to get annhilated as long as I don't use the fat free mayo and try to skinny them up...light works well though. Their seasoned salt is pretty stellar as well...now if only I could get them to give me some free products for advertising their website?? 


If you go to the website, you can find a consultant to order from near your area.  Let me know if you try anything new that I should know about!! 


Pin It


Tuesday, January 17, 2012

Chicken lo mein

Since the New Year, I've been trying to cook even healthier, without oil and butter etc, in order to keep up with our very cliche weight loss goals for the year...the wedding date is a way better motivation than I've ever had in years past though! We are still kicking pretty good at it, I've tried some great new recipes which I will be sharing, but also reverted back to some old stand-bys of my own that I haven't made as much since I started this blog and trying new things on a regular basis. I used to have a couple handfulls of recipes I would circle through and that was that...didn't want to spend too much time in the kitchen so the recipes I had memorized and could just grab ingredients for at the store without having a list always trumped trying something new.

This is one of the old standbys, and there are only a few ingredients needed and the rest is whatever you want to throw in...I've been making this for years, and I like it because it's all fresh ingredients, no oil or butter or anything like that, and it's low in calories.  The entire bottle of sauce is 400 calories and one bottle covers about 8 meals so you're looking at about 50 calories of sauce on top of fresh chicken and veggies per serving...not too shabby!

These are the veggies I decided to use this round...usually a few staples (like water chestnuts because I love them) and then whatever I've got in the fridge from other things (cabbage and sugar snap peas leftover). I've done broccoli, carrots, onions, or whatever else I feel the need to saute.   


This humongo box of noodles has lasted me years....seriously. Like I was wondering if I should still even be using them...but lo and behold, Google (wth did we do before you?) says I'm fine and they don't go bad. So I just boiled a handful of them according to the pachage directions. There are actual lo mein noodles which are thinner available in the pasta section I've gotten before, but these noodles seem to soak up the sauce so well, I will use them until they are gone.

You really don't need rice, but if you prefer to have rice, I go the easy route. Heat two of these babies up in the microwave and throw them in after everything is done.  Yumtastical!


No oil, just use fat free cooking spray to keep your chicken from sticking to the pan. I seasoned it with Lawry's, garlic powder, and cracked black pepper.


Aaaaand, your sauce. This is the stuff I use on my szechuan green beans, so I always have it on hand. 


After you cook your chicken until it's almost done, take it out and slice it into bite sized pieces. While you're doing this, throw all your veggies into the skillet/wok and add the sauce so they saute nicely and soak up all that flava flav! Add the chicken back to the pan and stir in the cooked noodles and rice.  Leave on a low heat and continue to stir until chicken is completely cooked through.  Serve.  Drool. Love. Die happy.  And die basically fat free.

I made this last Wednesday and ate it for lunch at least for 4 days (so the one reason I don't make this often is that I know I am going to have metric crap tons of leftovers, you just can't add all the veggies you want without having a heap of food).  I don't get sick of this stuff, I'm telling you...the sauce gives it just enough heat to make it not boring, the veggies are still very crunchy and fresh tasting, the noodles soak up the sauce perfectly so they're never dry but not at all tasting as though they are soaked in grease...perfection.


Pin It