Showing posts with label canning. Show all posts

Saturday, October 15, 2011

Laura's spagetti sauce

My mom's friend Laura is a legit Italian.  I used to babysit for her chillins when I was younger, and I remember the homemade pizza like it was yesterday...I'm talking from scratch, no refridgerated crusts here, people. She always made her own bread too, the smells in this house were amazing!

Well, I happened to get to go out to lunch with Mama K and Laura a while back and somehow touched on the subject that I was looking for a good pasta sauce recipe for the gazillion tomatoes that would be coming up soon.  Could I have mentioned this around a better lunch partner?? Not in a million...

So she scribbled down her ingredient list, gave me some instructions, and I couldn't wait to get enough tomatoes to give it a shot.  Well, my tomatoes first started coming in smaller batches...and I had some Mrs. Wages packets so I cheated and used those for my first two smaller attempts at pasta sauce. A couple weeks ago, my luck changed and my bounty was ready to be harvested!! I had more tomatoes that I knew what to do with...so I knew it was time!

4 pork chops
olive oil
tomato sauce
tomato paste
fresh basil
sugar
minced garlic

I added:
turkey pepperonis
onions
mushrooms
ground italian sausage
diced tomatoes, drained
4 jalopenos, whole

Sear the pork chops (bone in) in your stock pot with olive oil.


Add all other ingredients....I went by instinct/taste for amounts since I was making such a large batch. I also used my own tomatoes that I blanched to remove the skin and blended up to make juice.  The spagetti sauce link above will show you this method if you have whole tomatoes to use....I added the jalopenos to the blending so there are no chunks, it's liquified heat added to the sauce. My little helper is adding ingredients to the pot as I prepare them....


We took the bones off the pork chops at this point and let the sauce simmer overnight (setting the alarm to stir every so often of course).  Simmering for 5-6 hours is the key to great pasta sauce in my opinion...it melds all the flavors together so perfectly, and basically melts/disintegrates the pork chops to add taste without huge chunks of pork....believe me, this takes a while but it is totally worth it!


You will never catch me buying pasta sauce at the store again....


And in true food hoarder fashion, I canned the whole stockpot full (although I did freeze 4 pints).  Some people, Laura included, are not fans of canning the sauce since freezing takes less time and keeps it for the same length of time.  With a cow, a pig, my Sam's Club seafood hoard, the frozen green beans from the garden, and frozen sweet corn I do each year taking up my freezer space, I like to have the canning option available to me and just store my hoard of sauce, salsa, and pickles downstairs and out of the way. 


Freezin is the easier option,  but if you would like to can your sauce, directions for canning are here and are pretty simple if you have the time. Either way, if you have a free afternoon, do yourself a favor and enter the world of homemade pasta sauce....I would bet the farm that you won't be returning to the other side!  Thanks for the authentic recipe, Laura!!

Pin It


Friday, September 23, 2011

Spagetti sauce

I've had a hankering to make my own spagetti sauce for some time now. I didn't exactly know where to start so I bought these....Mrs. Wages spagetti sauce packets. 


This weekend I had about 21 tomatoes that were ripening in the house, and were ready to be used for some sauce experimentation. I don't want to do this on a large scale until I perfect the procedure. I have a recipe for bonafide pasta sauce from a legit Italian that I'm dying to use, but wanted to use up these sauce packets on the smaller batches first.  My mom's friend Laura's recipe will be posted after I get a large crop of tomatoes at once....I want to can hers as I'm positive it's going to drool worthy, and I don't have the freezer space to freeze that much of it.  Anyway, since I used this packet, this is more of a tutorial on the procedure of using your own tomatoes than it is a recipe.  But I will guarantee you, that after trying this, I have vowed to never buy my spagetti sauce again!

First thing first...pick your maters.  Mrs. Wages calls for 18 medium sized tomatoes per packet (about 6 lbs of fresh tomatoes, or 6 of the 14.5 oz cans of diced tomatoes if you don't have a garden)...you could probably use a few more or a few less.  Wash the maters...especiallly if you have a dog that likes to pee in your garden like I do.  Sorry for the picture of that in your head but I've seen him to it and will NEVER forget to wash the produce from then on!

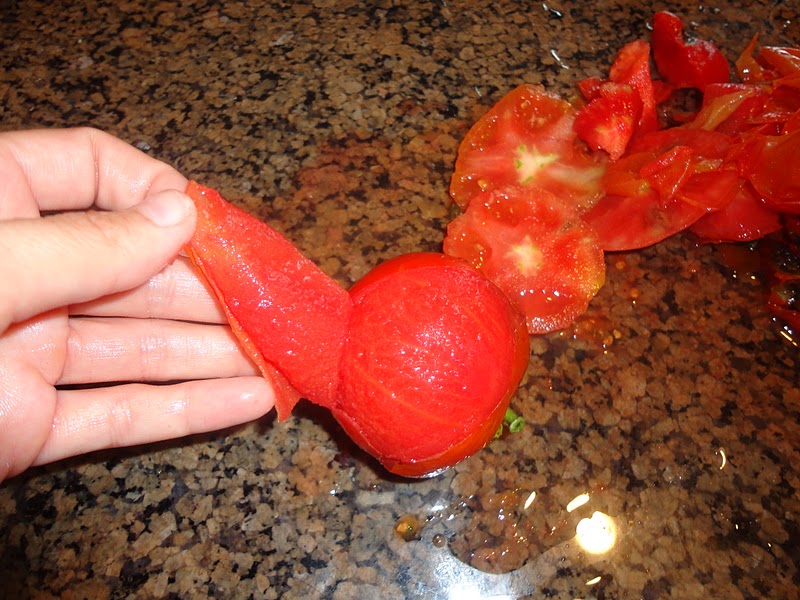
Get a pot of water to a rolling boil and lower your tomatoes into it. Cook them for 3 minutes in the water, or until you start to see the skin crack....this means it will be very easy to remove the skin! I had to do 2 batches in this sized pot, I didn't want to get my huge stock pot out for some reason.


Throw the tomatoes immediately into ice cold water to prevent them from cooking any more after their 3 minutes in the boiling water bath are complete....


Peel back all the skins and cut all bad parts and cores out of the tomatoes...you only want the healthy, juicy flesh for your sauce.


Add the cleaned up tomatoes to your food processor or blender, and puree them into a liquid.  I also added 2 jalapenos and a habanero (all with seeds removed), 3 cloves of garlic, and 1 cup of fresh basil to the blender to infuse more flavor into the liquid tomatoes.


After blending the mixture into a liquid, I added it to a saucepan with the Mrs. Wages packet, and a 1/4 cup of sugar (which I am thinking of omitting for my next try).  Bring to a boil.


While this is heating up, I was cooking 1 lb of italian sausage, some full and mini sized turkey pepperonis, some canadian bacon, and a diced onion to add to the sauce when it was done.


After the liquid boils, turn it to low, add your meat and onion (and mushrooms if you have any) and let the sauce simmer on low for as much time as you have, stirring occasionally. I let mine go for about an hour while I did dishes and cleaned up.  I added some italian seasoning at this point as well.


I cannot even tell you how much better this was than it's store bought counterparts.  Adding the peppers, garlic, and basil to the puree gave it some good flavor but not too much kick, it thickens up nicely while simmering, and all the different meats each add their own element to the sauce. 

This size batch made a little more than 3 of the Ball freezer jars (I believe they are pints) full of sauce, but we obviously had to save one back to eat immediately and froze the other two. These things are ahhhhh-mazing by the way...they screw on so the lids won't pop off in the freezer when the sauce expands, and if you have freezer space, it is a far easier alternative to canning. 


Anyway, all of this work on Saturday leads to this on Sunday night....now that's a Sunday dinner!!


EDIT: I did another batch of this the following weekend, exactly the same except I didn't de-seed the jalapenos and habanero and YEEEEEEEHHHHHHHEEEEEEEE was that shizz warm!  I absolutely love the sauce with some smoke but if you aren't a heat seeker then make sure you take the seeds out of your peppers or you will get a lot more flavor than you bargained for....just an fyi!

Pin It


Wednesday, September 7, 2011

Frozen green beans

It's was a busy week last week, it was a busy weekend, it's a busy week this week, and going to be another busy weekend....who am I kidding? This is going to be a hulluva September with all we've got going on!  We are kicking off tailgating season this weekend with the Iowa/Iowa State game (GO STATE!!) for my BFF's 30th birthday....there's so much to celebrate this month!!  Anyway, the posts are going to be short and sweet for a bit, but we'll get back in the swing of regular dinners at home here soon I hope...

But for now...I need to figure out what to do with my garden.  My green beans are overrunning the joint, I picked about 5 lbs this weekend, and we ate a bunch of them my standard way of spicing them up and making the szecuan green beans that the boys like so much.  But I had a TON left, and gave Grandma Theda a call to figure out what to do with them (I refuse to waste such a yummy veggie).  She wasn't a fan of freezing and gave me instructions to can them...alas, I had no time to can so just thought I would try a small batch of freezing and hope for the best. 

Found some instructions online that seemed simple enough.  Just have to blanch them, and bag them.  So here we go with snapping the ends off the beans before washing and cooking them...


Next step: blanching. Sounds tough, but is really very simple. Boil a big pot of water until it's rolling.  Throw the beans in for 3 minutes, and immediately drain and toss them into a pot of freezing water with ice in it to stop the cooking.  This releases the enzymes in the bean to prevent them rotting or getting dried out in the freezer.  Add them to your bags in 2 cup portions and freeze (making sure you get all the air out of the bags before sealing). 

As I said Ive never done this before, so can't vouch yet for how they turn out....but this is supposedly a pretty easy shortcut to canning.  I will hopefully get one more big batch of beans when I have some time to can and use Grandma's advice to can them with bacon! 


Pin It


Monday, August 29, 2011

Frozen sweet corn

This is Justin's mom's recipe and I can't thank her enough for giving it to me a couple summers ago...this is my 3rd year doing it (which means it's my 3rd year having sweet corn to cook all through the winter)!!  I don't know how I lived before. I literally cringe when I have to use canned corn for something.  It just isn't the same....and those of you from Iowa know exactly what I'm talking about. 

This year I did 5 dozen ears.  Sounds like a lot but when you have to go through the Fall, Winter, Spring, plus some of Summer before the corn comes up for sale again...5 dozen doesn't sound like much.  We still have to ration it toward the end, but I don't have the freezer space to make much more.  I threw around the idea of canning it this year but the more I read on it, the more I found people saying you don't get the flavor you get from freezing it.  So here we go...

Shuck your corn.  This is the absolute worst part if you don't have a helper.  I hate it.


I hate it so much I went and got a beer to help me.  Shameless plug for the lover's company on my coozie...


OK, the corn is shucked....if you didn't notice it's dark out now.  Told you it sucks to shuck 5 dozen ears by yourself!  Doesn't help that I am a little OCD about getting the little hairs off the cobs because I hate when they get in my teeth.


Now is a good time to show you all the nifty devices that I have bought over the last couple years to help me with the part that's next: cutting the corn off the cobs.  This one was the first one I found in some little kitchen shop in a strip mall with my mom, thought it would be worth a try....it wasn't.  Totally useless, which I would have known if I have my brain that day.  This thing would only take off 2 rows of corn at a time even if it did work without feeling like it was taking my fingers off....maybe if I wasn't doing 60 ears of corn at a time that might be ok. 


This one was the second try...bigger cutting area AND is shaped to the roundness of the corn...has to be better, right?  Wrong.  Serious design flaw and almost cut my arm right down my wrist pulling it down the corn.  Suicide by corn cob cutting, anyone?  Not the way I want to go out....


I finally gave up on buying these gadgets and have discovered that once I actually bought a set of good knives, the bread knife in the set works amazingly well.  Not much effort, just cut to the cob and go.  So this is what we use now.  Whew, that was rough. 


Candy (Justin's mom) used to use an electric knife, he said that worked pretty slick but I never wanted to go out and buy one.  Maybe next year?

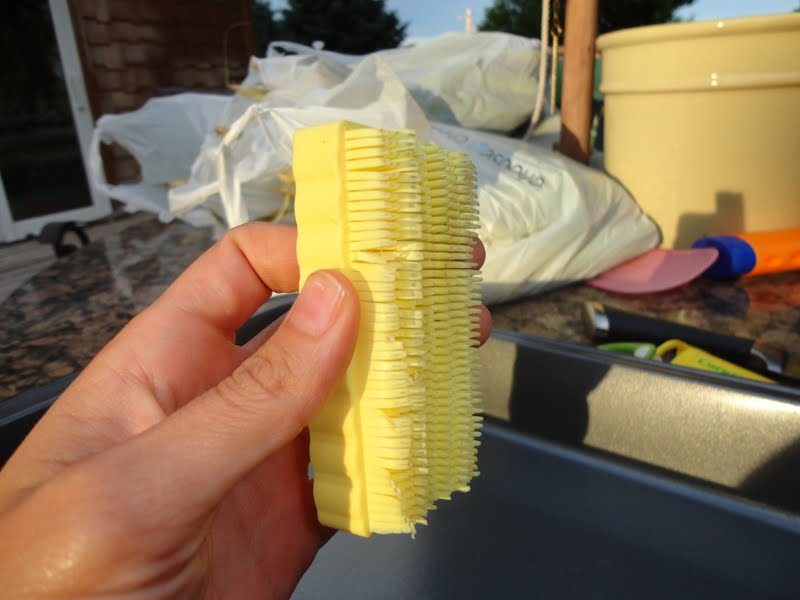
I mentioned my OCD with the silky hair in the corn after shucking it.  This was my miracle product when I found it in the store...I was so excited that someone made something to cure my problem, and even more pumped that the time doing this would be cut in half since I wouldn't have to be picking each hair out by it's lonesome.


It didn't work.  Well, technically it did at first.  But when you're doing the volume I do, the hairs just get wrapped up in the bristles and make the bristles not work after a few ears.  So in the end, what I've learned is....don't buy stupid shit from kitchen stores unless you know it's going to work.  Read up on it first!

OK, now that we've got all that taken care of...we cut the corn off the cobs and into a roaster pan.  Justin came home just in time to help with that part! Notice I needed a couple more beers after the shucking part...don't judge the greasy hair, it was hot on my run that night!


After your roasting pan is full, transfer to the stock pot and continue to cut....


Once all your corn is cobbed (is that what you call it?), put it on the lowest setting burner you have on your stove and add 1/4 gallon skim milk, and 4 cups light butter.  Let simmer for an hour or so (lid on), stirring very frequently making sure to move around the corn on the bottom to prevent burning. 

The original recipe calls for half and half instead of skim milk, but I wanted to lighten the calorie content up a little and skim works just fine taste and consistency wise.  Candy also roasts hers, but I didn't have a roaster pan big enough so doing it in the stock pot has worked well for me.

After corn is cooked (yes, you can taste it now, go ahead), you bag it up.  I get freezer bags which I fill with 1 and 1/2 cups of the corn plus liquid, remove all air from the bags before sealing, and stack in the freezer.  That seems to be the perfect portion for Justin and I for one night's dinner, so I can just lay one bag out for us, and if we have company, lay extra out as needed. 

Throw them in the freezer and enjoy all year long! It's a lot of work but soooooo worth having sweet corn year round.  I wouldn't lie to you. And neither would anyone that's eaten it at our house for Christmas or a random February dinner.


Pin It


Tuesday, August 23, 2011

Pickles

I will admit I take the easy way out with my pickles.  I suppose if I'm going to the trouble to can and pickle my cucumbers, I should have my own pickling mixture and do it from absolute scratch.  But I don't.  And I don't really care to.  Canning is such a time consuming activity that I will cut corners where need be.  It is so rewarding though to walk into the basement and see rows of pickles, salsa, etc and know that you grew the food, made the food, and canned the food.  Call me Grandma, but I like the feeling of accomplishment and the "living off the land" vibe I get from the whole process. This is my second year doing pickles and salsa, and I'm hoping to do tomato sauce this year as well.  I usually freeze my sweet corn but am throwing around the idea of canning it too this year, just to save on freezer space. 

Anyway, this lady is a lifesaver.  Meet Mrs. Wages.


Mix this bag with 7 and 1/3 cups water and 3 and 1/3 cups white vinegar, bring to a boil, and you've got yourself some pickling mixture.  Easy as that.  Which is very nice, becuase the rest of the process takes some time.


Mmmmm, makes the house smell all sorts of pickle-y.  First step in the canning process is the fill your stockpot up with water and get it to boil. I usually add some salt to it, throw the lid on, and let it sit for a half hour or more to get up to a rolling boil.  This is a BIG pot if you can't tell by the comparison picture!


While the water heats up, I get out my sanitized jars and lids, and start cutting my cucumbers into pickle spears and slices for sandwiches...I do both kids.  Your jars need to be clean and have no chips in the rim of the glass or they won't seal for you, which means your pickles will rot if you leave them out.  The ones that don't seal will stay in the fridge for quite a few weeks but can't be left unrefridgerated.  Fill your jars up with as many as will fit, and make sure to leave a little room at the top so the pickles will be submerged in pickling liquid when the lid is shut.


I bought a simple canning kit which was like $15 or so, and it has come in pretty handy.  It came with some rubber tongs to grab the jars in and out of the boiling water as well as a large bottomed funnel to get the pickling juice into the jars like so...


Fill to the top and secure youe lid.  When the jars are tightly sealed, you need to submerge them with a wire basket into the boiling water.  NEVER put the jars in the bottom of the pot right onto the burner.  They will crack and break immediately on direct heat.  Believe me, I know.  I lost a good portion of salsa last year due to this mistake.  Seems very obvious looking back but for a first time canner, I had no idea.  Lower the basket into the boiling water and make sure the jars are fully submerged and getting boiled from all directions, as well as not touching each other on the sides, as that can cause breakage too. 


Put your lid on and let the water boil for 25 minutes before removing the jars with your rubber tongs and setting them on a towel to cool.  You will continue to hear the jar lids popping as you go about your business because they actually don't seal until they are cooling.  I was pretty pumped that all of mine popped this year, so we had none that needed to be eaten right away....pickles are better if you give them a week to themselves to hang out and party in the juice. 

Since you can only do so many jars at once and they take a half hour per batch, there is a lot of down time once you're actually in the canning process.  So I was switching loads of dishes and loads of laundry, etc while each batch would boil.  In the end, I had 16 jars of pickles sitting on the shelves of the basement, after about 3 hours of work.  Not a bad little Saturday...


Pin It


Monday, May 9, 2011

Fresh salsa!

Thought I would post the ingredients of our Stensland summer salsa in case anyone wants to give it a shot.  I honestly have never counted the amounts of anything I put in...I just mix it, give it a taste, add whatever's needed, and repeat the process. 

But here's what goes in it, in whatever quantities you wish to use.  I would probably use more peppers than most because I like it HOT HOT HOT, but I have to tame it down for Justin's 30 year old stomach.  :)

Tomatoes
Onions
Jalopenos (add a habanero for a big batch if you like hot like me)
Cilantro
Garlic (fresh and minced)
Lime juice (fresh squeazed)

I do not add salt or anything that's not fresh, as we just love the raw veggie flavor of it, it tastes so summery and is great if you want to knock back a few beers.  So for around 25 pint jars yesterday (that I canned for the first time and ALL of them sealed, yay me!) I used 4 pallets of tomatoes which had about 8 large tomatoes on each pallet, 2 HUMONGOUS onions from Costco (like Im serious that Ive never seen an onion this size in my entire 28 years), a normal bunch of cilantro, about 6 full garlic cloves minced, 4 habaneros, approximately 15 medium sized jalopenos, and 10 small limes squeazed into the mix.  This is all an estimation so don't quote me but you can throw your own batch together and add or subtract whatever you like.  You could cut this in half or even in quarter and have a very nice sized batch of salsa. 

To get the veggies the consistency I want, I use a slap chop for the peppers and smaller stuff.  It makes nice uniform chunks so you're not getting hot bites sometimes and bland bites other times.  I will have to post a picture of the other chopper I use for the tomatoes as it leaves them a perfect size.  You could also use a blender or a food processor if you wanted, but I have neither of those so I do it all by hand.

If you make a batch this size, you will need to learn how to can them, and that's a whole 'nother post that I don't have time for right now.  Maybe when I do pickles soon I will let you in on the canning process...on that note, Happy Monday everyone!